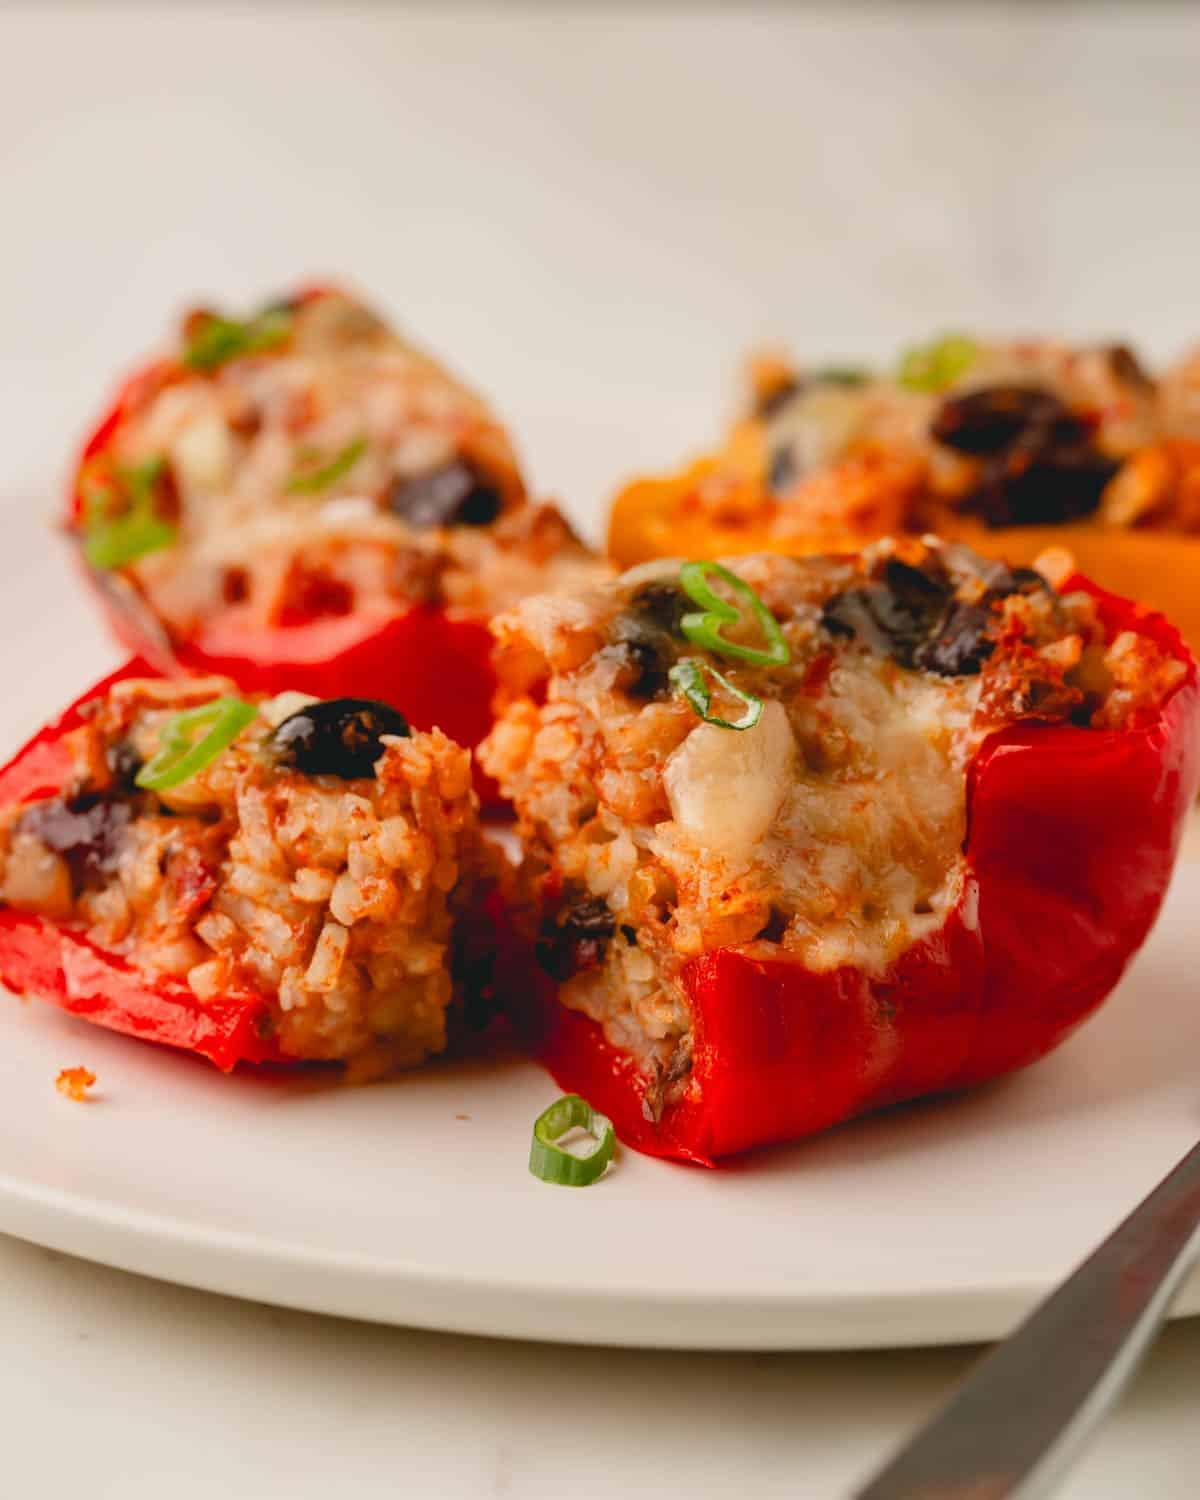
Why you’ll love this stuffed peppers recipe
My 9-year-old son raves about grandma’s stuffed peppers. After hearing about those delicious stuffed peppers numerous times, I had to ask my mother-in-law for her recipe! It turns out she makes it with leftover chili!!! Genius!
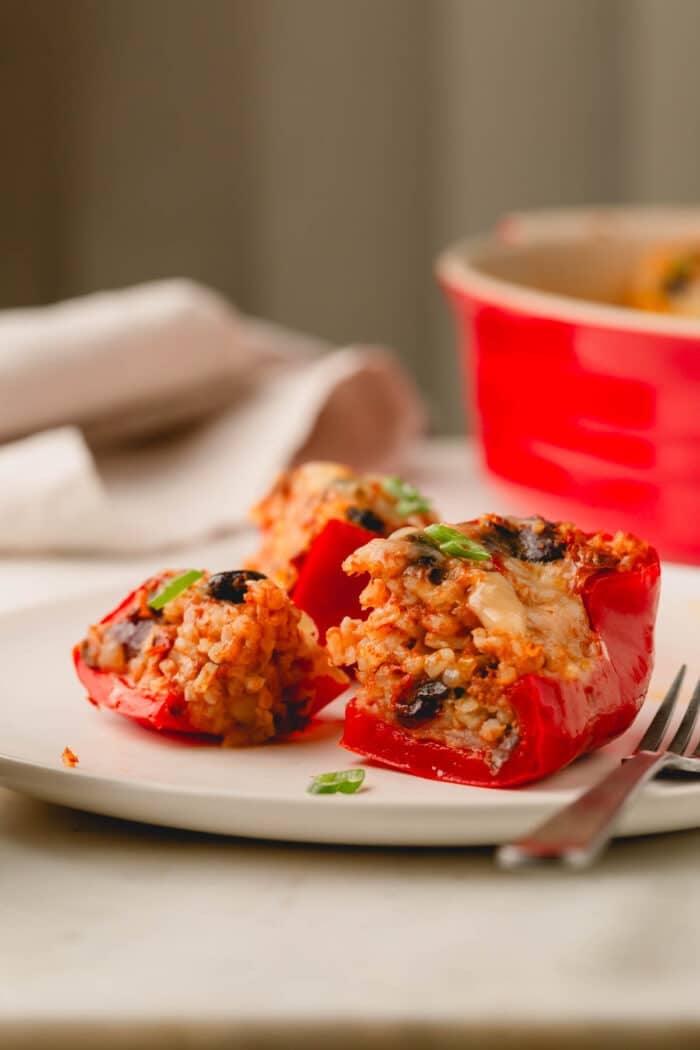
- Flavorful – Chili and cheese are a match made in heaven, adding warm, savory flavor. Then, tender bell peppers add a light taste for a well-rounded meal.
- Quick – Using leftover chili and cooked rice reduces prep time significantly, meaning you can have this recipe on the table in just 45 minutes!
- Great for leftovers – Repurpose leftover Instant Pot chili and your favorite type of rice such as cilantro lime rice or fluffy white rice so nothing goes to waste and you don’t get bored of eating the same thing over and over.
Enjoy your stuffed peppers on their own, or add a side of refried beans or a cucumber salad. Go ahead and make extras, too. That way you can cook once and eat twice!
Key Ingredient Notes
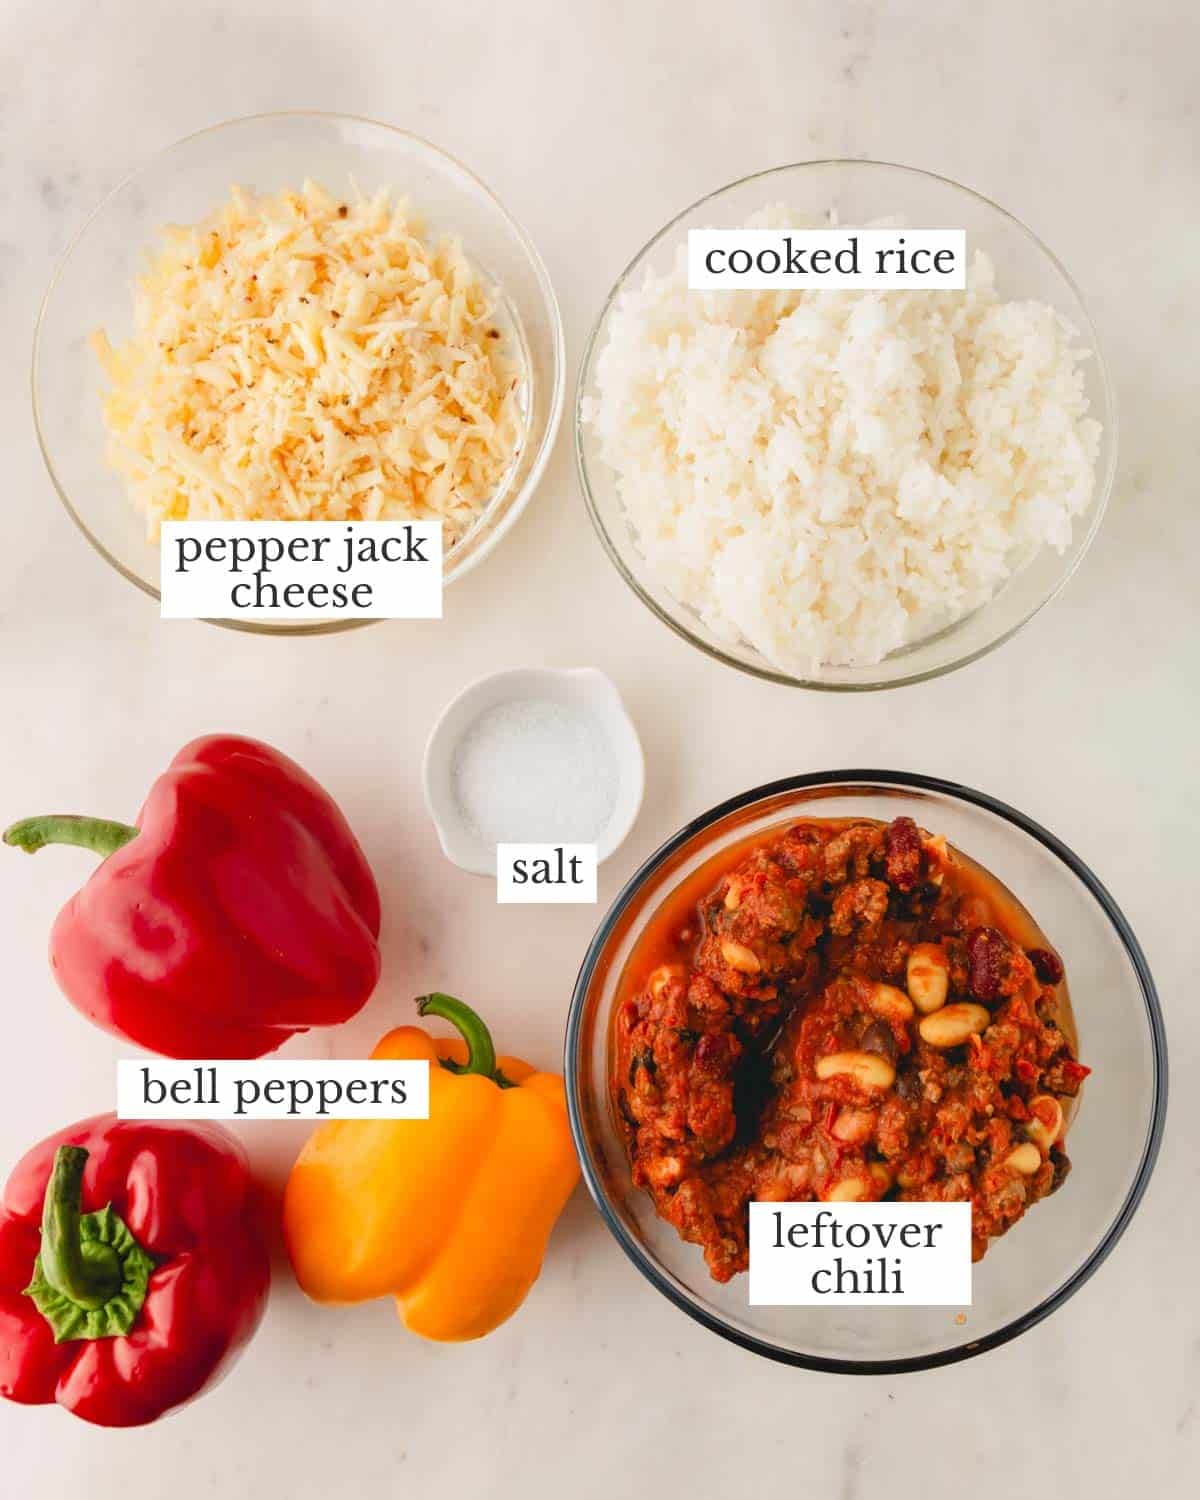
- Bell peppers – I prefer to use red bell peppers, yellow bell peppers, or orange bell peppers because they tend to be slightly sweeter. However, green bell peppers will also work. Look for large peppers as they’ll be easier to stuff!
- Chili – I recommend using a more classic chili like my 30-minute chili or Instant Pot chili. Prepare a large pot one night, and save leftovers to make these peppers the next day!
- Rice – I prefer to use neutral rice like white rice or Instant Pot rice, but you can use any rice you have on hand. Just make sure it’s fully cooked!
- Cheese – I use pepper jack cheese for a slight kick of spice, but you can use any cheese you like best such as cheddar or mozzarella.
How to make chili stuffed peppers
Before you begin, preheat your oven to 350°F.
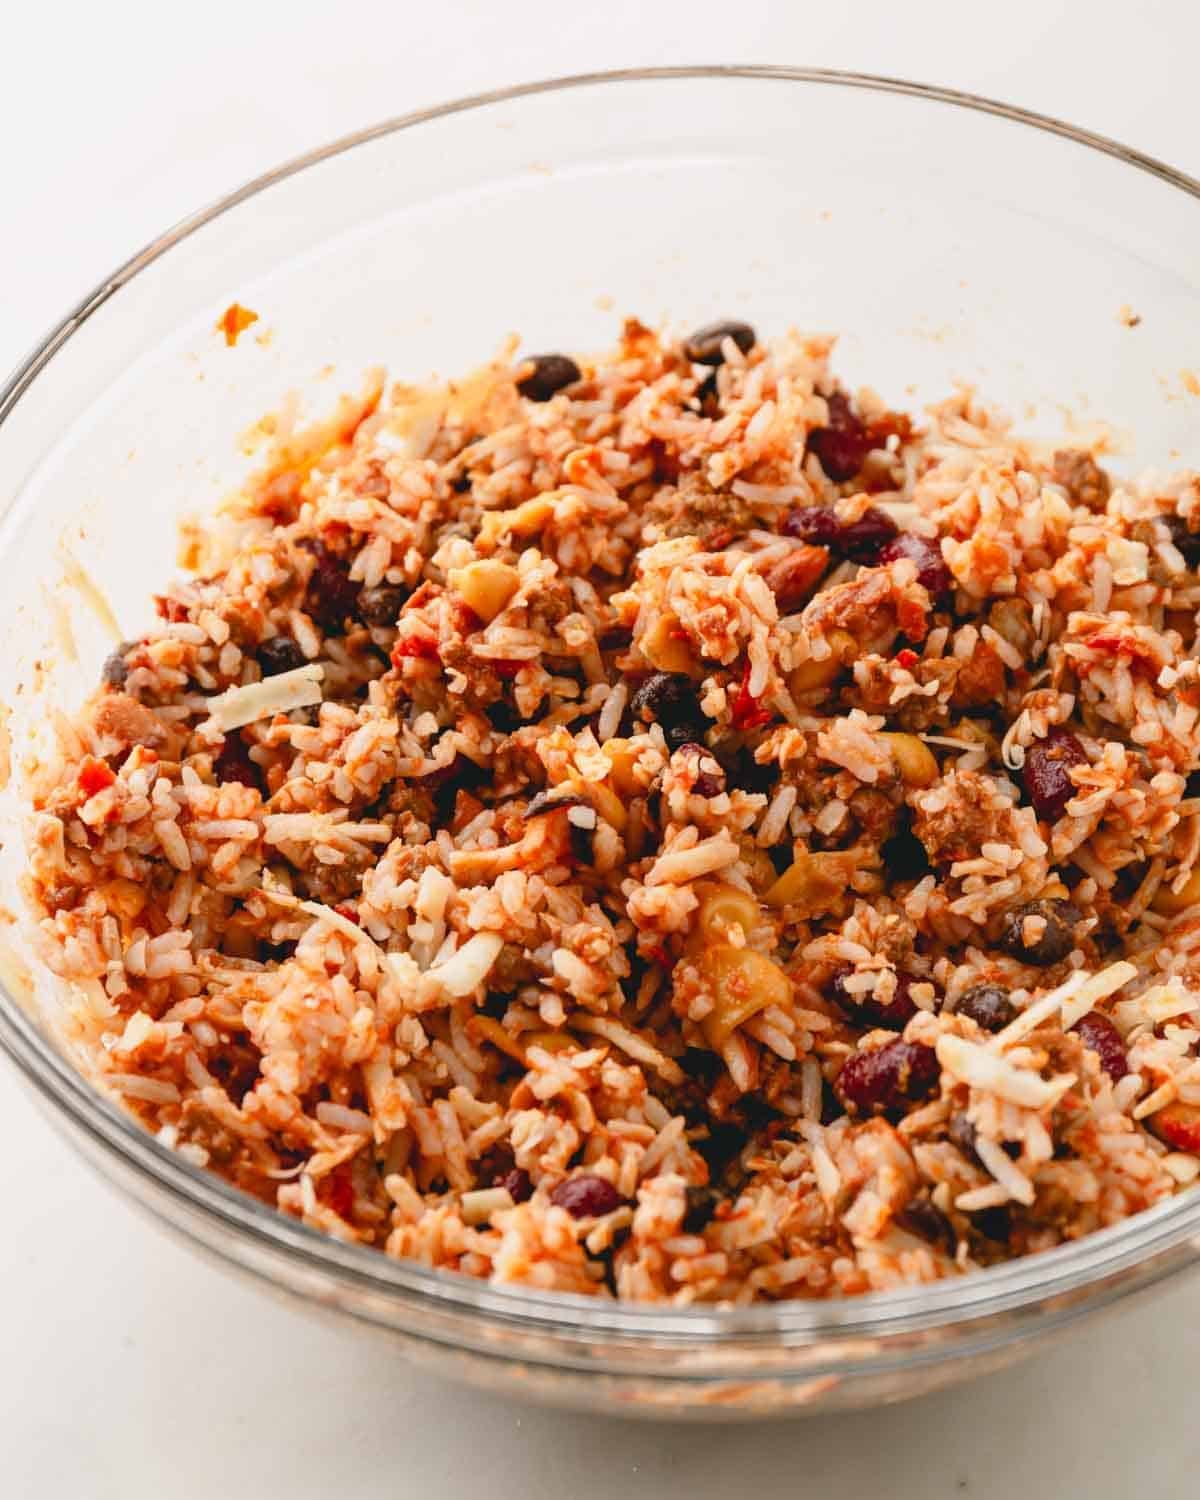
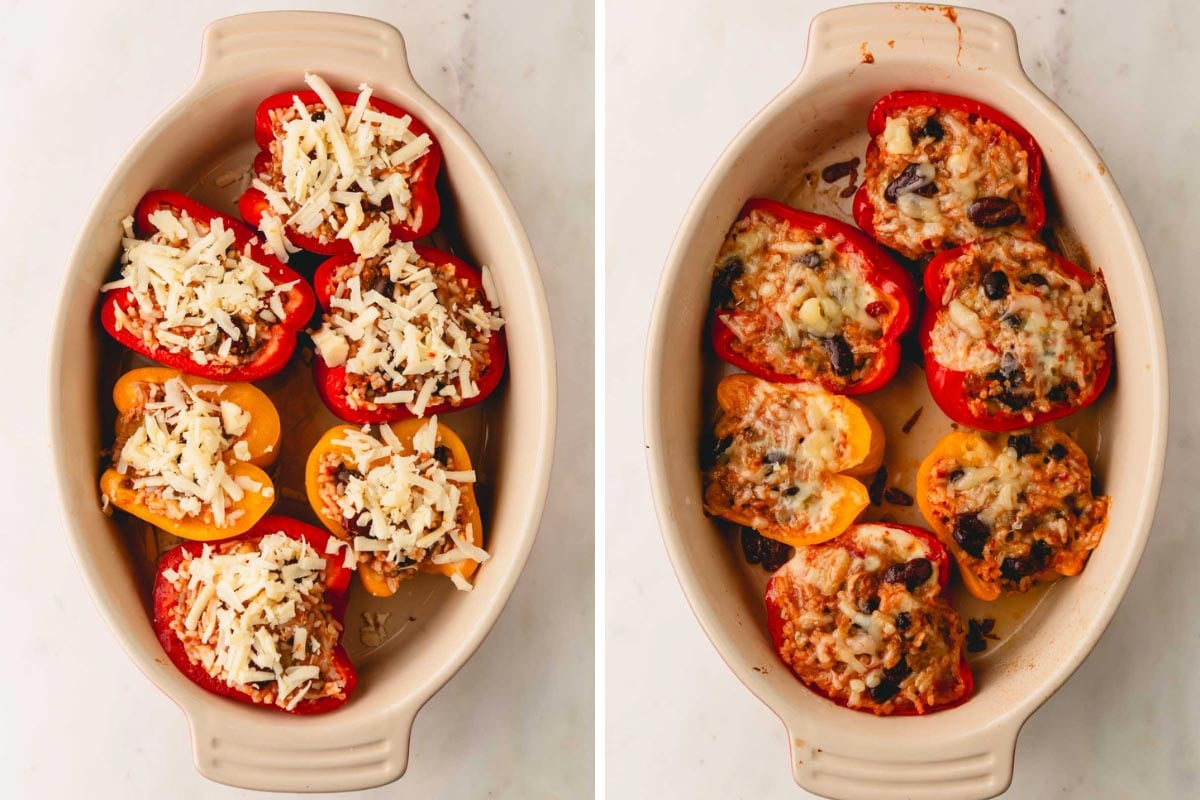
- Mix the chili, rice, and 1 cup of cheese in a large bowl.
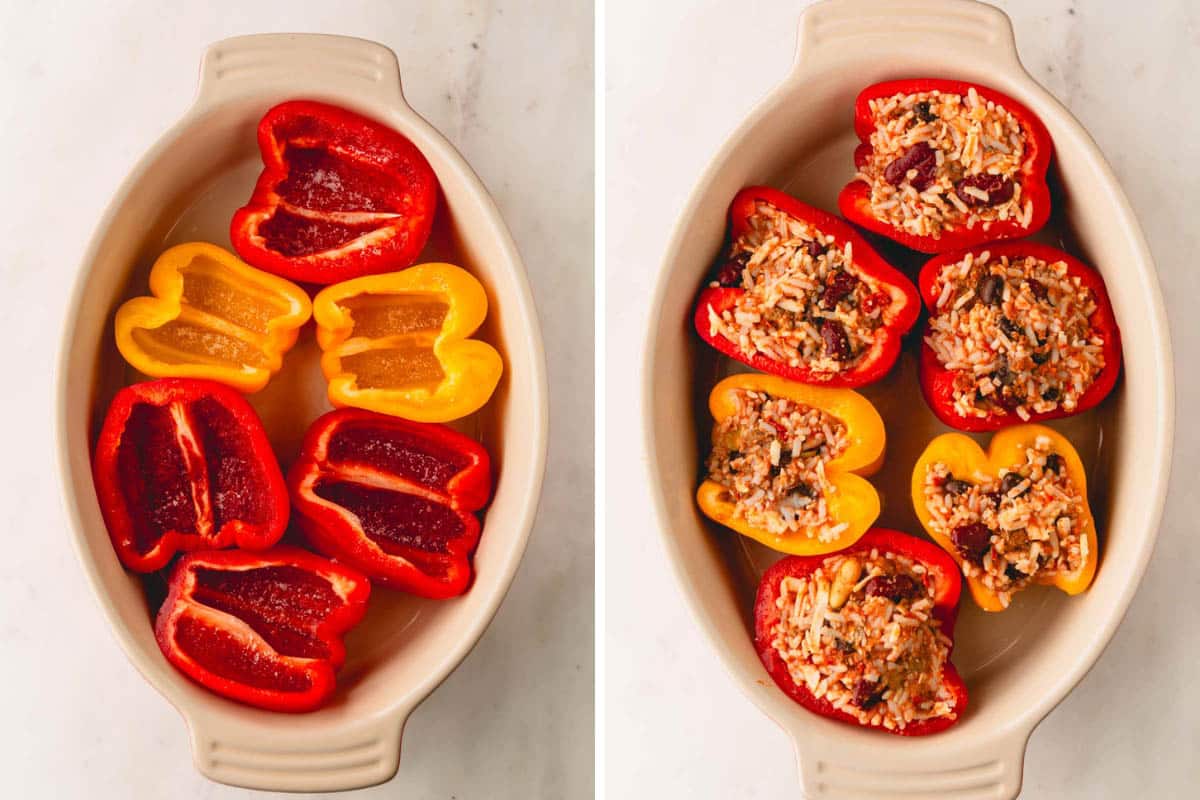
- Cut the peppers in half and remove the seeds. I prefer to cut them in half over cutting the tops, because it’s easier to fill, and they won’t fall over!
- Arrange the peppers cut side up in a casserole dish, and sprinkle them with salt and pepper.
- Fill each pepper with the chili mixture, and sprinkle the remaining cheese on top.
- Pour ½ cup of water into the bottom of the pan. This helps to cook the peppers from the outside. (TIP: My mother-in-law adds salsa instead of water, which adds even more flavor!)
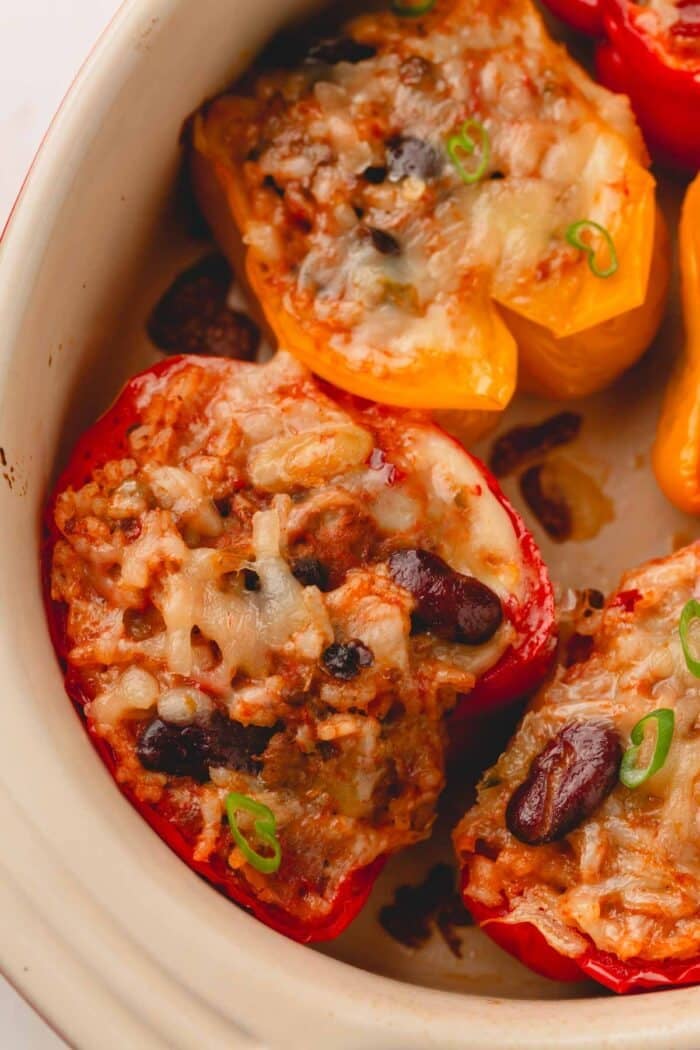
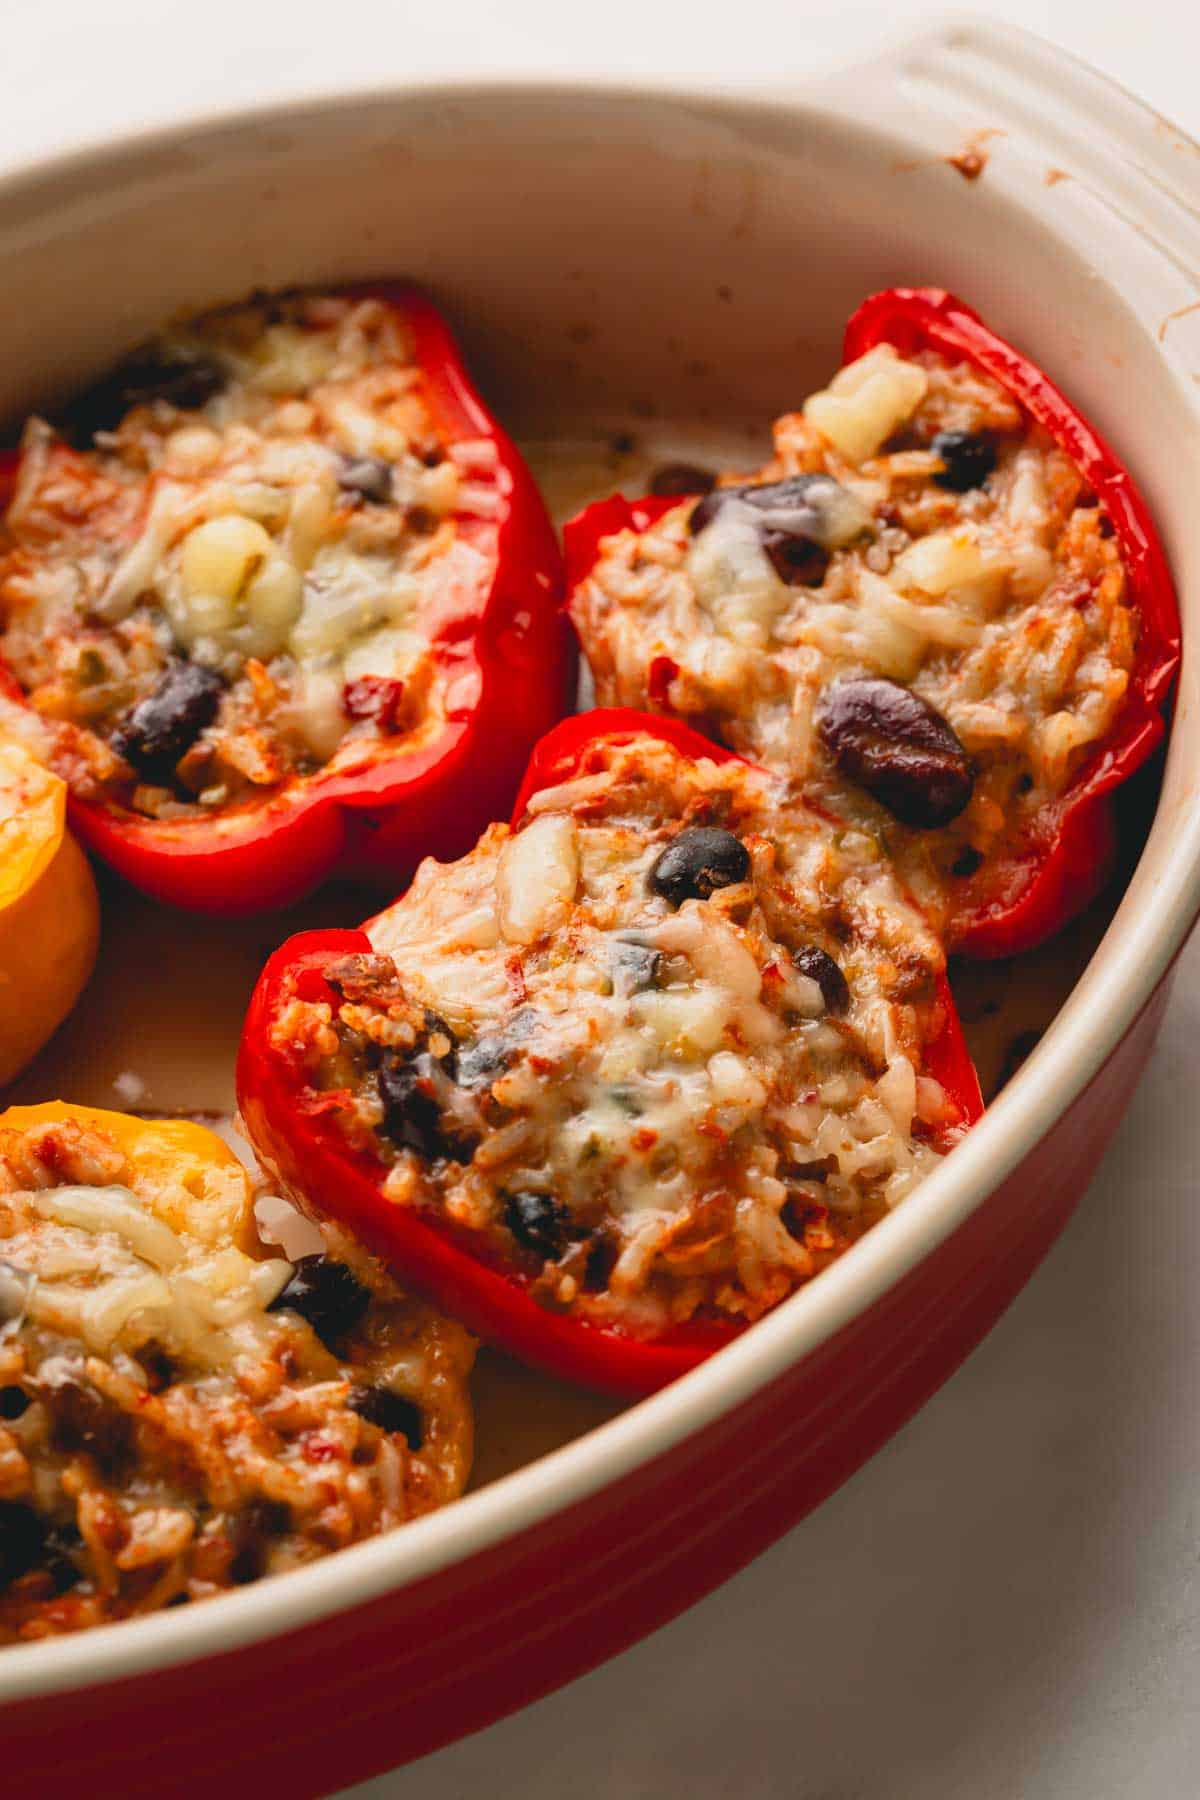
- Cover, and bake until the peppers are tender. This takes about 30 minutes!
Time-Saving Tips
Thanks to the use of pre-made ingredients, these stuffed peppers come together in under an hour. However, there are a few things you can do to speed up the process even further.
- Slice the peppers, and remove the seeds up to a day in advance. Store them in an airtight container in the fridge until you’re ready to cook.
- If shredding your own cheese, do so a day or two in advance, and store it in a separate airtight container.
Make-Ahead Tips
Planning ahead is crucial for this recipe. Otherwise, you’ll have to cook fresh rice, make a pop of chili, and then stuff and bake the peppers. Who has time for all of that?
- Prepare the chili up to 3 days in advance, and store it in an airtight container in the fridge.
- Cook the rice, and store it in a separate airtight container in the refrigerator for 1-2 days.
- You can also assemble the peppers up to 1 day in advance. Arrange them in a baking dish, cover it with foil, and it them in the fridge. When you’re ready to bake, proceed with the recipe as usual, adding a few minutes to the baking time as needed for the peppers to soften and warm through.
Storing Tips
Store leftover chili stuffed peppers in an airtight container in the refrigerator for up to 4 days. Or, freeze for up to 3 months.
To reheat, thaw frozen peppers in the refrigerator overnight. Then, reheat them in the microwave or in the oven at 350°F. If the cheese begins to brown too quickly, cover the dish with foil, and continue to bake until the peppers warm through.
FAQs:
In my experience, it’s not necessary to cook the peppers before cooking. Adding some liquid into the baking pan expedites the cooking time without the need to pre-cook the peppers.
You can easily enjoy stuffed peppers on their own. Or, add a side of refried beans, cornbread, oven roasted mixed vegetables, or a light salad if you want to make your meal even more filling.
It typically takes about 30 minutes for peppers to soften in the oven when baked at 350°F. Be sure to add some liquid into the baking dish. The cooking time doubles without any liquid in the pan!
More Easy Dinner Recipes:

Cheesy Chili Stuffed Peppers
Ingredients
- 2 cups leftover chili
- 2 cups cooked rice
- 1 ½ cups shredded pepper jack cheese Note 1
- 6 bell peppers any color
- 1 teaspoon coarse kosher salt
Instructions
- Preheat the oven to 350°F.
- In a large bowl, mix chili, rice and 1 cup of cheese.2 cups leftover chili, 2 cups cooked rice, 1 ½ cups shredded pepper jack cheese
- Cut the peppers in half and remove the seeds. (I prefer to cut the peppers in half over cutting the tops because it’s easier to fill and they won’t fall over.)6 bell peppers
- Arrange the peppers in 9×13 casserole pan, cut side up, and sprinkle each pepper half with salt.1 teaspoon coarse kosher salt
- Fill the peppers with the chili mixture.
- Sprinkle the remaining ½ cup of cheese on top.
- Pour ½ cup of water into the bottom of the baking pan.
- Cover and bake for about 30 minutes, or until peppers are tender.
Share your thoughts! If you make this please leave a review letting me know how it was!
Notes
– Store leftover chili stuffed peppers in an airtight container in the refrigerator for up to 4 days.
– Freeze cooked peppers for up to 3 months.
– To reheat, thaw frozen peppers in the refrigerator overnight. Then, reheat them in the microwave or in the oven at 350°F. If the cheese begins to brown too quickly, cover the dish with foil, and continue to bake until the peppers warm through.
Nutrition
* Disclaimer: All nutrition information are estimates only. Read full nutrition disclosure.

Tried this recipe?
Make sure to leave a recipe review below!
Sharing of this recipe is encouraged and appreciated. Copying of full recipe to any social media is prohibited.

Comments + Reviews